Mostly an excuse to play with, and show off the capabilities of, the rather fabulous Ipython notebook! I have created an Ipython notebook to demonstrate how to use GMT to do spectral analysis on images.
This is demonstrated by pulling wavelengths from images of rippled sandy sediments.
GMT is command-line mapping software for Unix/Linux systems. It's not really designed for spectral analysis in mind, especially not on images, but it is actually a really fast and efficient way of doing it!
This also requires the convert facility provided by Image Magick. Another bodacious tool I couldn't function without.
My notebook can be found here.
Fantastic images of ripples provided by http://skeptic.smugmug.com
Showing posts with label bash. Show all posts
Showing posts with label bash. Show all posts
Wednesday, 14 August 2013

Friday, 26 July 2013

Thursday, 25 July 2013
How to start a BASH script


Wednesday, 24 July 2013
Friday, 8 March 2013
Coordinate system conversion using cs2cs from PROJ
I hate geodesy. It's confusing, multifarious, and ever-changing (and I call myself a scientist!). But we all need to know where we, and more importantly our data, are. I have need of a single tool which painlessly does all my conversions, preferably without me having to think too much about it.
You could use an online tool, but when you're scripting (and I'm ALWAYS scripting) you want something a little less manual. Enter cs2cs from the PROJ.4 initiative. It will convert pretty much anything to anything else. Perfect.
In Ubuntu:
sudo apt-get install proj-bin
In Fedora I searched yum for proj-4
If the man page is a little too much too soon to take in, this wonderful page helps you decide which flags and parameters to use, with a rudimentary understanding of what you want
For example, if I want to convert coordinates in Arizona Central State Plane to WGS84 Latitude/Longitude, I use this:
(the State Plane Coordinate System is new to me, but my view of the whole field of geodesy is 'let's make things even more complicated, sorry, accurate!')
Let's decompose that a bit:
tells it I want decimal degrees with 6 values after the decimal point (you could leave this out if you want deg, min, sec)
says use the Transverse Mercator projection
are all parameters related to the input coordinates in Arizona Central State Plane (the 'to_meter' is a conversion from feet, the default unit, to metres)
are the parameters related to the output coordinates in Latitude/Longitude
infile is a two column list of points e.g.
2.19644131000e+005 6.11961823000e+005
2.17676234764e+005 6.11243565478e+005
2.19763457634e+005 6.11234534908e+005
2.19786524782e+005 6.11923555789e+005
2.19762476867e+005 6.11378246389e+005
outfile will be created with the results:
-111.846501 36.517758 0.000000
-111.868478 36.511296 0.000000
-111.845175 36.511202 0.000000
-111.844912 36.517412 0.000000
-111.845185 36.512498 0.000000
By default it will always give you the third dimension (height) even if you didn't ask for it, like above, so I tend to trim it by asking awk to give me just the first 2 columns separated by a tab:
-111.846501 36.517758
-111.868478 36.511296
-111.845175 36.511202
-111.844912 36.517412
-111.845185 36.512498
You could use an online tool, but when you're scripting (and I'm ALWAYS scripting) you want something a little less manual. Enter cs2cs from the PROJ.4 initiative. It will convert pretty much anything to anything else. Perfect.
In Ubuntu:
sudo apt-get install proj-bin
In Fedora I searched yum for proj-4
If the man page is a little too much too soon to take in, this wonderful page helps you decide which flags and parameters to use, with a rudimentary understanding of what you want
For example, if I want to convert coordinates in Arizona Central State Plane to WGS84 Latitude/Longitude, I use this:
(the State Plane Coordinate System is new to me, but my view of the whole field of geodesy is 'let's make things even more complicated, sorry, accurate!')
Let's decompose that a bit:
tells it I want decimal degrees with 6 values after the decimal point (you could leave this out if you want deg, min, sec)
says use the Transverse Mercator projection
are all parameters related to the input coordinates in Arizona Central State Plane (the 'to_meter' is a conversion from feet, the default unit, to metres)
are the parameters related to the output coordinates in Latitude/Longitude
infile is a two column list of points e.g.
2.19644131000e+005 6.11961823000e+005
2.17676234764e+005 6.11243565478e+005
2.19763457634e+005 6.11234534908e+005
2.19786524782e+005 6.11923555789e+005
2.19762476867e+005 6.11378246389e+005
outfile will be created with the results:
-111.846501 36.517758 0.000000
-111.868478 36.511296 0.000000
-111.845175 36.511202 0.000000
-111.844912 36.517412 0.000000
-111.845185 36.512498 0.000000
By default it will always give you the third dimension (height) even if you didn't ask for it, like above, so I tend to trim it by asking awk to give me just the first 2 columns separated by a tab:
-111.846501 36.517758
-111.868478 36.511296
-111.845175 36.511202
-111.844912 36.517412
-111.845185 36.512498
Friday, 30 November 2012
Create a diary for your daily workflow
You can modify your ~./bash_history file so it doens't store duplicates and stores more lines than the default (only 1000):
However, sometimes you want to go back to your history file and see what commands you issued on a particular day .... one solution is to make a periodic backup with a timestamp using cron.
First, make a directory to put your files in, and make a script which is going to do the work:
Open the shell script and copy the following inside
close, then in the terminal issue
admittedly hourly is a little excessive - go here is you are unfamiliar with cron scheduling definitions and modify as you see fit
However, sometimes you want to go back to your history file and see what commands you issued on a particular day .... one solution is to make a periodic backup with a timestamp using cron.
First, make a directory to put your files in, and make a script which is going to do the work:
Open the shell script and copy the following inside
close, then in the terminal issue
admittedly hourly is a little excessive - go here is you are unfamiliar with cron scheduling definitions and modify as you see fit
Wednesday, 28 November 2012
Installing Mb-System on Fedora 17
MB-System is the only fully open-source software I am aware of for swath sonar data including multibeam and sidescan backscatter. As such, I'm really hoping using it works out for me!
Compiling it on a fresh install of Fedora 17 wasn't that straight-forward (took me about 5 hours to figure all this out), so I thought I'd put together a little how-to for the benefit of myself, and hopefully you.
Test the install by issuing
you should see the manual pages come up. Right, now down to the business of multibeam analysis!
Compiling it on a fresh install of Fedora 17 wasn't that straight-forward (took me about 5 hours to figure all this out), so I thought I'd put together a little how-to for the benefit of myself, and hopefully you.
I've broken it down into a few stages so some sort of semblance of order can be imposed on this random collection of installation notes.
Step 1: download the software from ftp server here
In the terminal:
For me this created a folder called 'mbsystem-5.3.1982'
Step 2: install pre-requisites
A) Generic Mapping Tools (GMT). You need to go to the Downloads tab, then click on the INSTALL FORM link. This will take you to a page where you can download the installation script, and fill in an online form of your parameter settings which you can submit and save the resulting page as a textfile which becomes the input to the bash script. Sounds confusing, but it's not - the instructions on the page are adequate. I opted to allow GMT to install netCDF for me. Then in the terminal I did this:
C) X11
D) openmotif
E) fftw
F) ghostview - I had to install this indirectly using kde3:
(Note to Fedora - why oh why oh why are B, C, and F above not installed by default!?)
G) OTPSnc tidal prediction software: download from here
untar, and cd to the directory
first double check that ncdump and ncgen are installed (which ncdump ncgen)
then edit the makefile so it reads:
then in the terminal issue:
Hopefully this compiles without errors, then I moved them to a executable directory:
Step 3: prepare mbsystem makefiles
cd mbsystem-5.3.1982/
You have to go in and point install_makefiles to where all your libraries are. This is time-consuming and involves a lot of ls, which, and whereis!
Here's a copy of the lines I edited in my install_makefiles parameters:
Then in the terminal
Step 3: install mbsystem
first I had to do this (but you may not need to)
I then updated my ~/.bashrc so the computer can find all these lovely new files:
Test the install by issuing
you should see the manual pages come up. Right, now down to the business of multibeam analysis!
Saturday, 29 September 2012
Downloading Photobucket albums with Matlab and wget
Here's a script to take the pain out of downloading an album of photos from photobucket.
It uses matlab to search a particular url for photo links (actually it looks for the thumbnail links and modifies the string to give you the full res photo link), then uses a system command call to wget to download the photos All in 8 lines of code!
Ok to start you need the full url for your album. The '?start=all' bit at the end is important because this will show you all the thumbnails on a single page. Then simply use regexp to find the instances of thumbnail urls. Then loop through each link, strip the unimportant bits out, remove the 'th_' from the string which indicates the thumbnail version of the photo you want, and call wget to download the photo. Easy-peasy!
It uses matlab to search a particular url for photo links (actually it looks for the thumbnail links and modifies the string to give you the full res photo link), then uses a system command call to wget to download the photos All in 8 lines of code!
Ok to start you need the full url for your album. The '?start=all' bit at the end is important because this will show you all the thumbnails on a single page. Then simply use regexp to find the instances of thumbnail urls. Then loop through each link, strip the unimportant bits out, remove the 'th_' from the string which indicates the thumbnail version of the photo you want, and call wget to download the photo. Easy-peasy!
Saturday, 8 September 2012
Broadcom wireless on Ubuntu 12.04
I just upgraded to Ubuntu 12.04 and my broadcom wireless card was not being picked up. It took me some time to figure out how to do this, and the forums give a lot of tips which didn't work for me, so I thought I'd give it a quick mention.
Then disconnect your wired connection and reboot. I found it is crucial that you disconnect any wired connections.
Upon reboot, go to System Settings - Hardware - Additional Drivers
It should then pick up the broadcom proprietary driver. Install it, then reboot, and you should be back up and running!
Then disconnect your wired connection and reboot. I found it is crucial that you disconnect any wired connections.
Upon reboot, go to System Settings - Hardware - Additional Drivers
It should then pick up the broadcom proprietary driver. Install it, then reboot, and you should be back up and running!
Wednesday, 22 August 2012
Write and execute a Matlab script without opening Matlab
Here's an example of using cat to write your m-file and then execute from the command line. This particular example will just plot and print 10 random numbers.
Sunday, 27 March 2011
Wrapping and interfacing compiled code into more flexible and user-friendly programs using Zenity and Bash
Subtitles include:
1. How to reconstruct the three-dimensional shape of an object in a scene in a very inexpensive way using shadow-casting
2. How to write and execute a matlab script from a bash script
I've written a bash script - shadowscan.sh - which is a wrapper for a set of programs for the reconstruction 3D surface of an object in a series of photographs using the ingenious shadow-casting algorithm of Jean-Yves Bouguet and Pietro Perona
The script relies heavily on the GUI-style interfacing tools of Zenity and acts as an interface and wrapper for the algorithm as implemented by these guys. It will also write and execute a matlab script for visualising the outputs.
This script should live in a directory with the following compiled programs, all available here:
1. ccalib (performs the camera calibration to retrieve the intrinsic parameters of camera and desk)
2. find_light (performs the light calibration to find light-source coordinates)
3. desk_scan (does the 3d reconstruction)
4. merge (merges 2 3d reconstructions, e.g. from different angles)
and the following matlab script:
1. selectdata.m (available here)
When the makefile is run, it creates the compiled programs in the ./bin directory. It's important to consult the README in the main folder as well as within the 'desk_scan' folder to have a clear idea of what the program does and what the input parameters mean.
My program will check if the camera calibration and light calibration files exist in the folder and if not will carry them out accordingly then several reconstructions are carried out, and the outputs merged. Finally matlab is called from the command line to run 'p_lightscan_data.m' to visualize the results.
when the script finishes there will be the following output files:
1. xdim.txt - max dimension to scan to
2. params - camera calibration parameters
3. data - camera calibration data
4. light.txt - light calibration parameters
5. sample.pts - [x,y,z] of object, in coordinates relative to light source
6. sample_lightscan1.tif - filled colour contour plot of reconstructed object
7. sample_lightscan2.tif - mesh plot of reconstructed object
I've tried to keep it flexible. It will run only the elements it needs to. For example, if the camera or lighting has been carried out before for a different object it will pick up on that. Also, the program can be invoked by passing it two arguments (path to folder where sample images are, and what sequence of contrasts to use for the reconstruction), which avoids having to input with the graphical menus. Example usage:
1. bash shadowscan.sh
2. bash shadowscan.sh /home/daniel/Desktop/shadow_scanning/sample/bottle 30.35.40.45
1. How to reconstruct the three-dimensional shape of an object in a scene in a very inexpensive way using shadow-casting
2. How to write and execute a matlab script from a bash script
I've written a bash script - shadowscan.sh - which is a wrapper for a set of programs for the reconstruction 3D surface of an object in a series of photographs using the ingenious shadow-casting algorithm of Jean-Yves Bouguet and Pietro Perona
The script relies heavily on the GUI-style interfacing tools of Zenity and acts as an interface and wrapper for the algorithm as implemented by these guys. It will also write and execute a matlab script for visualising the outputs.
This script should live in a directory with the following compiled programs, all available here:
1. ccalib (performs the camera calibration to retrieve the intrinsic parameters of camera and desk)
2. find_light (performs the light calibration to find light-source coordinates)
3. desk_scan (does the 3d reconstruction)
4. merge (merges 2 3d reconstructions, e.g. from different angles)
and the following matlab script:
1. selectdata.m (available here)
When the makefile is run, it creates the compiled programs in the ./bin directory. It's important to consult the README in the main folder as well as within the 'desk_scan' folder to have a clear idea of what the program does and what the input parameters mean.
My program will check if the camera calibration and light calibration files exist in the folder and if not will carry them out accordingly then several reconstructions are carried out, and the outputs merged. Finally matlab is called from the command line to run 'p_lightscan_data.m' to visualize the results.
when the script finishes there will be the following output files:
1. xdim.txt - max dimension to scan to
2. params - camera calibration parameters
3. data - camera calibration data
4. light.txt - light calibration parameters
5. sample.pts - [x,y,z] of object, in coordinates relative to light source
6. sample_lightscan1.tif - filled colour contour plot of reconstructed object
7. sample_lightscan2.tif - mesh plot of reconstructed object
I've tried to keep it flexible. It will run only the elements it needs to. For example, if the camera or lighting has been carried out before for a different object it will pick up on that. Also, the program can be invoked by passing it two arguments (path to folder where sample images are, and what sequence of contrasts to use for the reconstruction), which avoids having to input with the graphical menus. Example usage:
1. bash shadowscan.sh
2. bash shadowscan.sh /home/daniel/Desktop/shadow_scanning/sample/bottle 30.35.40.45
Sunday, 20 March 2011
Using cron to backup Thunderbird emails
My bash script (which I've saved as backup_emails.sh in my home folder and made executable) looks a little like this:
Then invoke in cron using:
add something like:
which does the backup at 04.30 every day
 set -x
  x=`date +%y%m%d.%H%M`
  tar zcf thunderb-mail-${x}.tgz ~/.mozilla-thunderbird
  mv thunderb-mail-${x}.tgz /media/MY_HARDDRIVE/email_backups/
Then invoke in cron using:
crontab -e
add something like:
30 4 * * * ~/./backup_emails.sh
which does the backup at 04.30 every day
Sunday, 20 June 2010
Batch GIMP script for auto-sharpen, white-balance and colour enhance
Like you, my point-and-shoot camera in auto-ISO mode often, if not always, gives me pictures which need a little adjustment to realise their full potential.
In GIMP, I usually use the 'auto white balance' option which usually gives great results. Often, I also use the 'auto color enhance' option and, occasionally, I use a simple filter to sharpen the features in the image.
Here's a GIMP script which will automate the process for a folder of pictures There are four input parameters. The first is the 'pattern' to find the files, e.g. "*.tiff" gives you all the tiff files in the directory. The next three inputs refer only to the sharpening filter. I use the (confusingly named) 'unsharp' filter which works by comparing using the difference of the image and a gaussian-blurred version of the image.
'radius' (pixels) of the blur (>1, suggested 5)
'amount' refers to the strength of the effect (suggested 0.5)
'threshold' refers to the pixel value beyond which the effects are applied (0 - 255, suggested 0)
These require a little bit of trial and error, depending on the type of picture. In the command line, the script is called like this:
An obligatory example. Before:
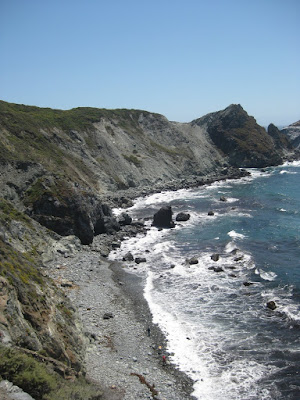
and after:
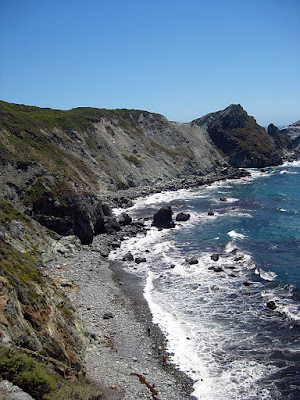
Enjoy!
In GIMP, I usually use the 'auto white balance' option which usually gives great results. Often, I also use the 'auto color enhance' option and, occasionally, I use a simple filter to sharpen the features in the image.
Here's a GIMP script which will automate the process for a folder of pictures There are four input parameters. The first is the 'pattern' to find the files, e.g. "*.tiff" gives you all the tiff files in the directory. The next three inputs refer only to the sharpening filter. I use the (confusingly named) 'unsharp' filter which works by comparing using the difference of the image and a gaussian-blurred version of the image.
'radius' (pixels) of the blur (>1, suggested 5)
'amount' refers to the strength of the effect (suggested 0.5)
'threshold' refers to the pixel value beyond which the effects are applied (0 - 255, suggested 0)
These require a little bit of trial and error, depending on the type of picture. In the command line, the script is called like this:
gimp -i -b '(batch-auto-fix "*.JPG" 5.0 0.5 0)' -b '(gimp-quit 0)'
An obligatory example. Before:

and after:

Enjoy!
Sunday, 6 June 2010
Convert movies to be compatible with ZEN X-Fi media player
Creative - another company which doesn't provide support for non-Windows users. Get with the times, losers!
The ZEN player needs a specific format of movie (bit-rate and aspect ratio). Here's how to do it with mencoder (available for free on all platforms)
The ZEN player needs a specific format of movie (bit-rate and aspect ratio). Here's how to do it with mencoder (available for free on all platforms)
mencoder 'MyMovie.avi' -oac mp3lame -lameopts cbr:mode=2:br=96 -af resample=44100 -srate 44100 -ofps 20 -ovc lavc -lavcopts vcodec=mpeg4:mbd=2:cbp:trell:vbitrate=300 -vf scale=320:240 -ffourcc XVID -o MyMovie4zen.avi
Granular Therapy
Here's a relaxing movie I just made of spinning modelled sand grains:
I'm not going to divulge the details of the model of how to create the sand grains (a current research project of mine). I can tell you I used these rather excellent functions for MATLAB:
Volume interpolation Crust algorithm, described more here
A toolbox for Multi-Parametric Optimisation
I used 'recordmydesktop' to capture the grains in my MATLAB figure window. It created an OGV format video (which I renamed to 'beautiful_grains.ogv'). I then used the following code to decode the video into jpegs
I needed to crop the pictures to just the grains, then turn the cropped pictures back into a video. I used this:
et voila! Now sit back with a cuppa and relax to those spinning grains.
I'm not going to divulge the details of the model of how to create the sand grains (a current research project of mine). I can tell you I used these rather excellent functions for MATLAB:
Volume interpolation Crust algorithm, described more here
A toolbox for Multi-Parametric Optimisation
I used 'recordmydesktop' to capture the grains in my MATLAB figure window. It created an OGV format video (which I renamed to 'beautiful_grains.ogv'). I then used the following code to decode the video into jpegs
 mkdir out_pics
 mplayer -ao null -ss 00:00:03 -endpos 50 beautiful_grains.ogv -vo jpeg:outdir=out_pics
I needed to crop the pictures to just the grains, then turn the cropped pictures back into a video. I used this:
 cd out_pics
 for image in *.jpg
 do
 # crop the image
 convert $image -crop 600x600+350+135 grains%05d.tiff
 done
 # make movie from the cropped tiffs
 ffmpeg -r 25 -i grains%05d.tiff -y -an spinning_grains_small.avi
et voila! Now sit back with a cuppa and relax to those spinning grains.
Saturday, 5 June 2010
Updated Power Spectrum from an Image
A while back I posted on using ImageMagick to do a full frequency-decomposition on an image, and create a power spectrum. It had several inaccuracies. Here's an update with how to do it better
First, you need to install a version of IM which is HDRI enabled (see here)
# test for valid version of Image Magick
# test for hdri enabled
#read $file, load and converting to greyscale
# crop image to smallest dimension
# crop image, and convert to png (why?)
# get data, find mean as proportion, convert mean to percent, and de-mean image
# pad to power of 2
# fft
# get spectrum
... but it's still not quite right. Any tips?
First, you need to install a version of IM which is HDRI enabled (see here)
# test for valid version of Image Magick
 im_version=`convert -list configure | \
  sed '/^LIB_VERSION_NUMBER /!d; s//,/; s/,/,0/g; s/,0*\([0-9][0-9]\)/\1/g'`
 [ "$im_version" -lt "06050407" ] && errMsg "--- REQUIRES IM VERSION 6.5.4-7 OR HIGHER ---"
# test for hdri enabled
 hdri_on=`convert -list configure | grep "enable-hdri"`
 [ "$hdri_on" = "" ] && errMsg "--- REQUIRES HDRI ENABLED IN IM COMPILE ---"
#read $file, load and converting to greyscale
convert $file -colorspace gray in_grey.tiff
# crop image to smallest dimension
min=`convert in_grey.tiff -format "%[fx: min(w,h)]" info:`
# crop image, and convert to png (why?)
convert in_grey.tiff -background white -gravity center -extent ${min}x${min} in_grey_crop.png
# get data, find mean as proportion, convert mean to percent, and de-mean image
 data=`convert in_grey_crop.png -verbose info:`
 mean=`echo "$data" | sed -n '/^.*[Mm]ean:.*[(]\([0-9.]*\).*$/{ s//\1/; p; q; }'`
 m=`echo "scale=1; $mean *100 / 1" | bc`
 convert in_grey_crop.png -evaluate subtract ${m}% in_grey_crop_dm.png
# pad to power of 2
 p2=`convert in_grey_crop_dm.png -format "%[fx:2^(ceil(log(max(w,h))/log(2)))]" info:`
 convert in_grey_crop_dm.png -background white -gravity center -extent ${p2}x${p2} in_grey_crop_dm_pad.png
# fft
convert in_grey_crop_dm_pad.png -fft in_ft.png
# get spectrum
convert in_ft-0.png -contrast-stretch 0 -evaluate log 10000 in_spec.png
... but it's still not quite right. Any tips?
Turn your OGV movie section into a cropped animated GIF
An example from a recent project
 # make directory for output jpg
 mkdir out_pics
 # section to the ogv video file into jpegs
 mplayer -ao null -ss 00:00:03 -endpos 50 beautiful_movie.ogv -vo jpeg:outdir=out_pics
 cd out_pics
 # loop over each image and crop into desired rectangle
 for image in *.jpg
 do
 convert $image -crop 600x600+350+135 "$image crop.tiff"
 done
 # turn into an animated gif
 convert -page 600x600+0+0 -coalesce -loop 0 *.tiff beautiful_animation.gif
Miscellaneous useful bash
For my benefit more than anything - things I use over and over again, but do not have the mental capacity to remember
# number of files in current directory
# check if you have a program installed
# only list the (sub-)directories in your current directory
# remove backup files
# use zenity get the directory where the file you want is
# list all txt files in this directory
# get this directory
# removes .txt (for example, for later use as start of filename)
# gets the rest of the file name
# turn string into (indexable) array
# get max and min dimensions of an image
# take away 1 from both
# number of files in current directory
ls -1R | grep .*.<file extension> | wc -l
# check if you have a program installed
aptitude show <name of program> | grep State
# only list the (sub-)directories in your current directory
ls -l | grep ^d
# remove backup files
find ./ -name '*~' | xargs rm
# use zenity get the directory where the file you want is
 zenity --info --title="My Program" --text="Select
 which directory contains the file(s) you want"
 export target_dir=`zenity --file-selection --directory`
# list all txt files in this directory
x=$( ls $target_dir | grep .*.txt |sort|zenity --list --title="Select" --column="coordinate file" )
# get this directory
export raw_dir=`zenity --file-selection --directory`
# removes .txt (for example, for later use as start of filename)
 str="$x"
 Var1=`echo $str | awk -F\. '{print $1}'`
# gets the rest of the file name
 str="$Var1"
 Var2=`echo $str | awk -F\- '{print $2}'`
# turn string into (indexable) array
 e=$(echo $mystring | sed 's/\(.\)/\1 /g')
 b=($e)
# get max and min dimensions of an image
 min=`convert image1.tiff -format "%[fx: min(w,h)]" info:`
 max=`convert image1.tiff -format "%[fx: max(w,h)]" info:`
# take away 1 from both
 min=$((min-1))
 max=$((max-1))
Subscribe to:
Posts (Atom)